Zippers with Tabs
Zippers are an indispensable part of just about every piece of outerwear and gear used in the outdoors, so of course they are essential for many MYOG projects. Read on to see how to assemble zippers with tabs that are ready to be sewn into your next project.
Single-Slider Zipper
For zippered pockets and other secondary zipper placements, a single slider is all you need. For this tutorial I’m using size 5 YKK zipper coil with a reverse-mounted slider.
Step 1: Assemble your materials
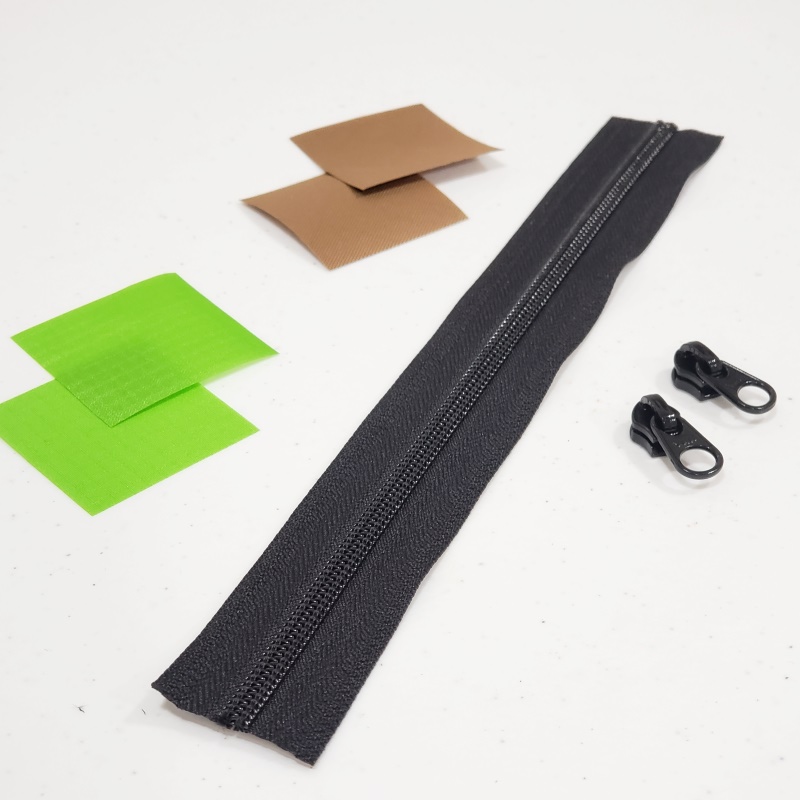
Our zipper will be assembled with a length of continuous zipper coil, one zipper slider, and 4 squares of fabric.
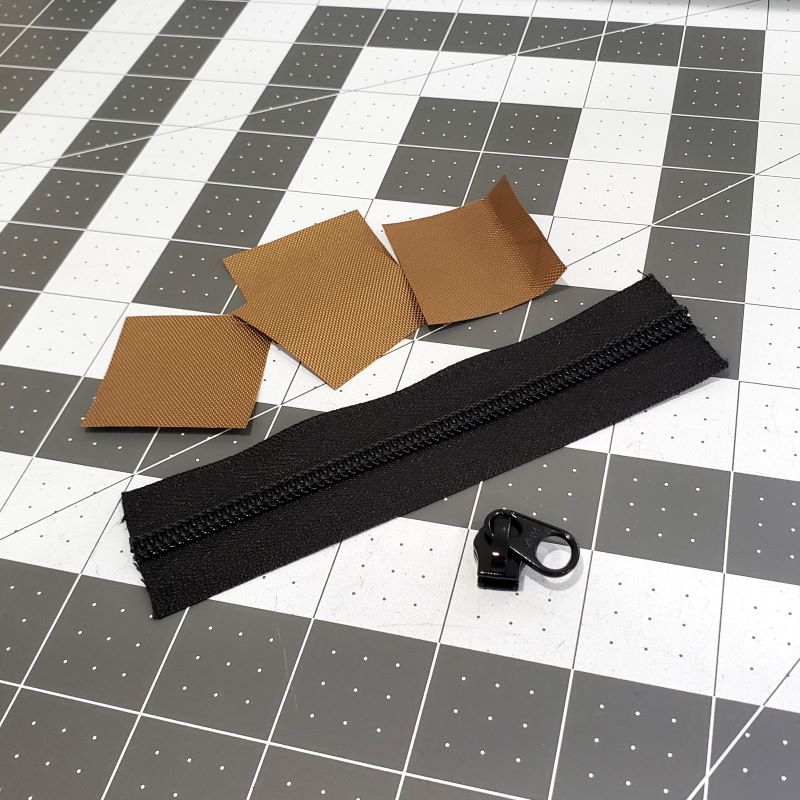
- Measure and cut your zipper coil according to your project needs.
- To maintain seam allowance around the zipper ends on your finished project panel, cut your zipper ½ inch (12mm) shorter than your panel on each end.
- Cut 2 tabs each from your choice of shell fabric and liner fabric, if you will have a liner. If no liner, cut 4 tabs from your shell fabric.
- I cut my tabs as squares or 1-½’’ (3.8cm) for size 3 YKK zippers and 1-¾’’ to 2’’ (4.5cm – 5cm) for size 5 YKK zippers.
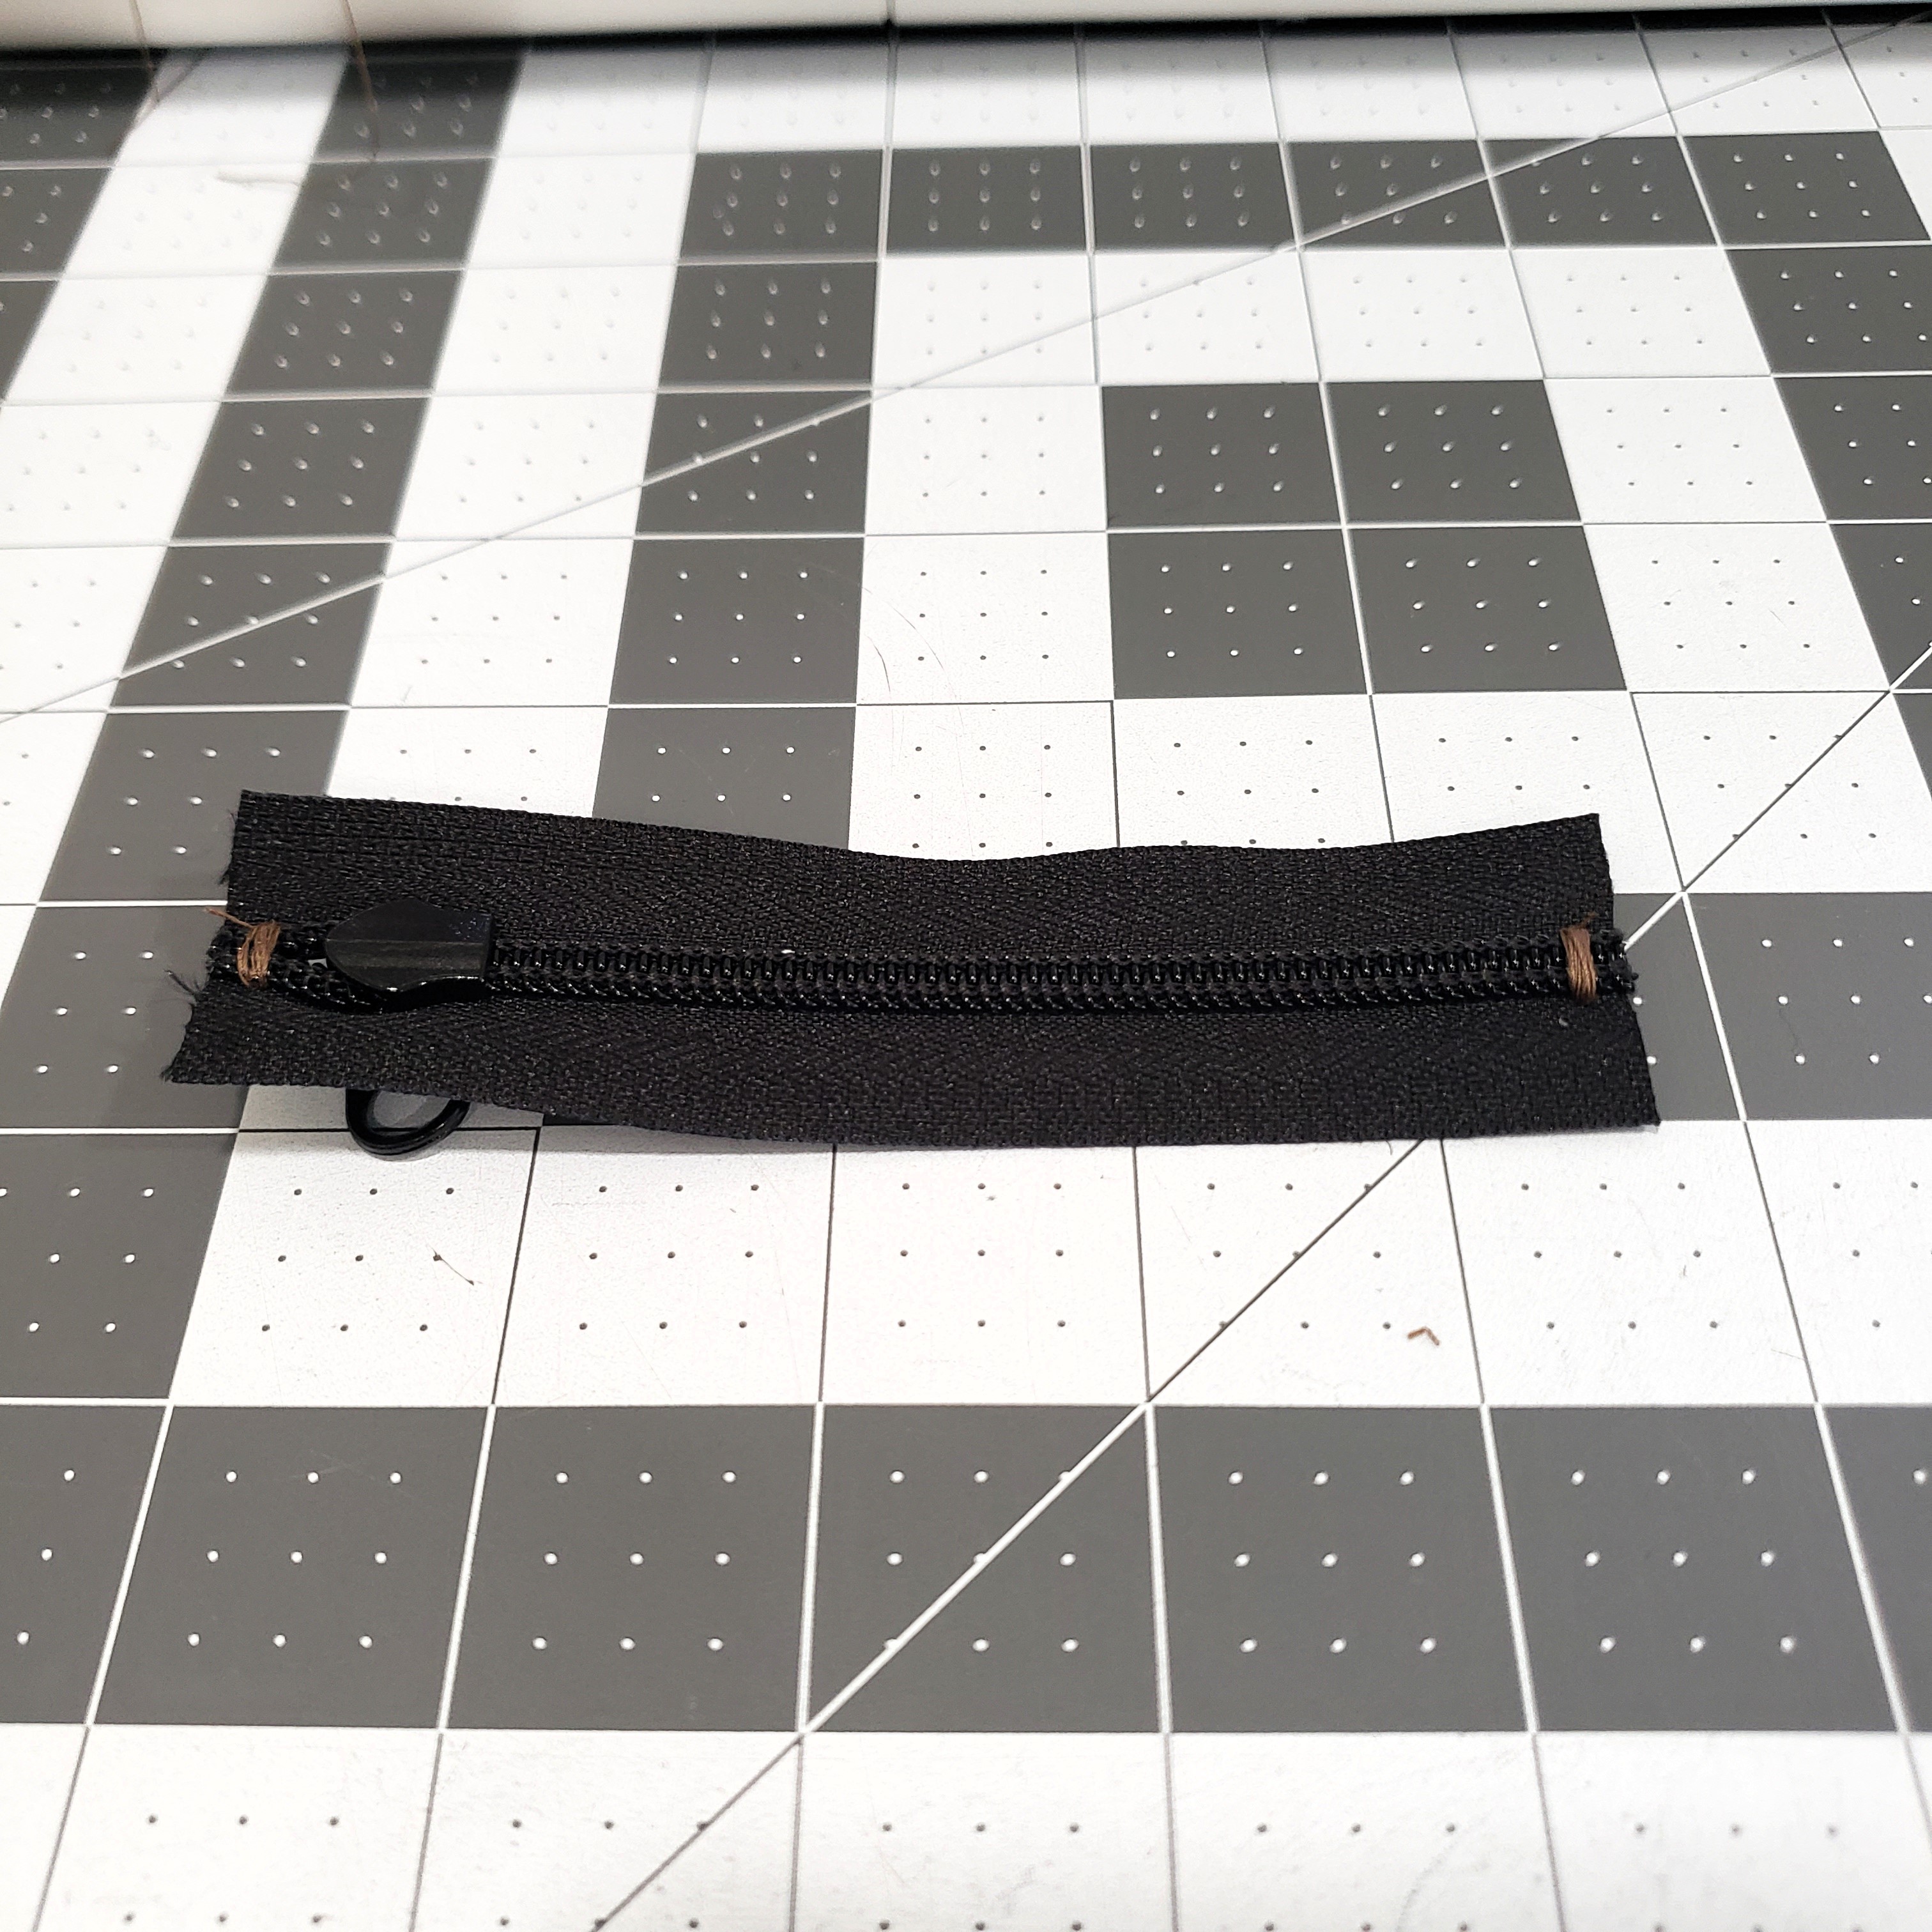
Step 2: Anchor the ends and add the slider
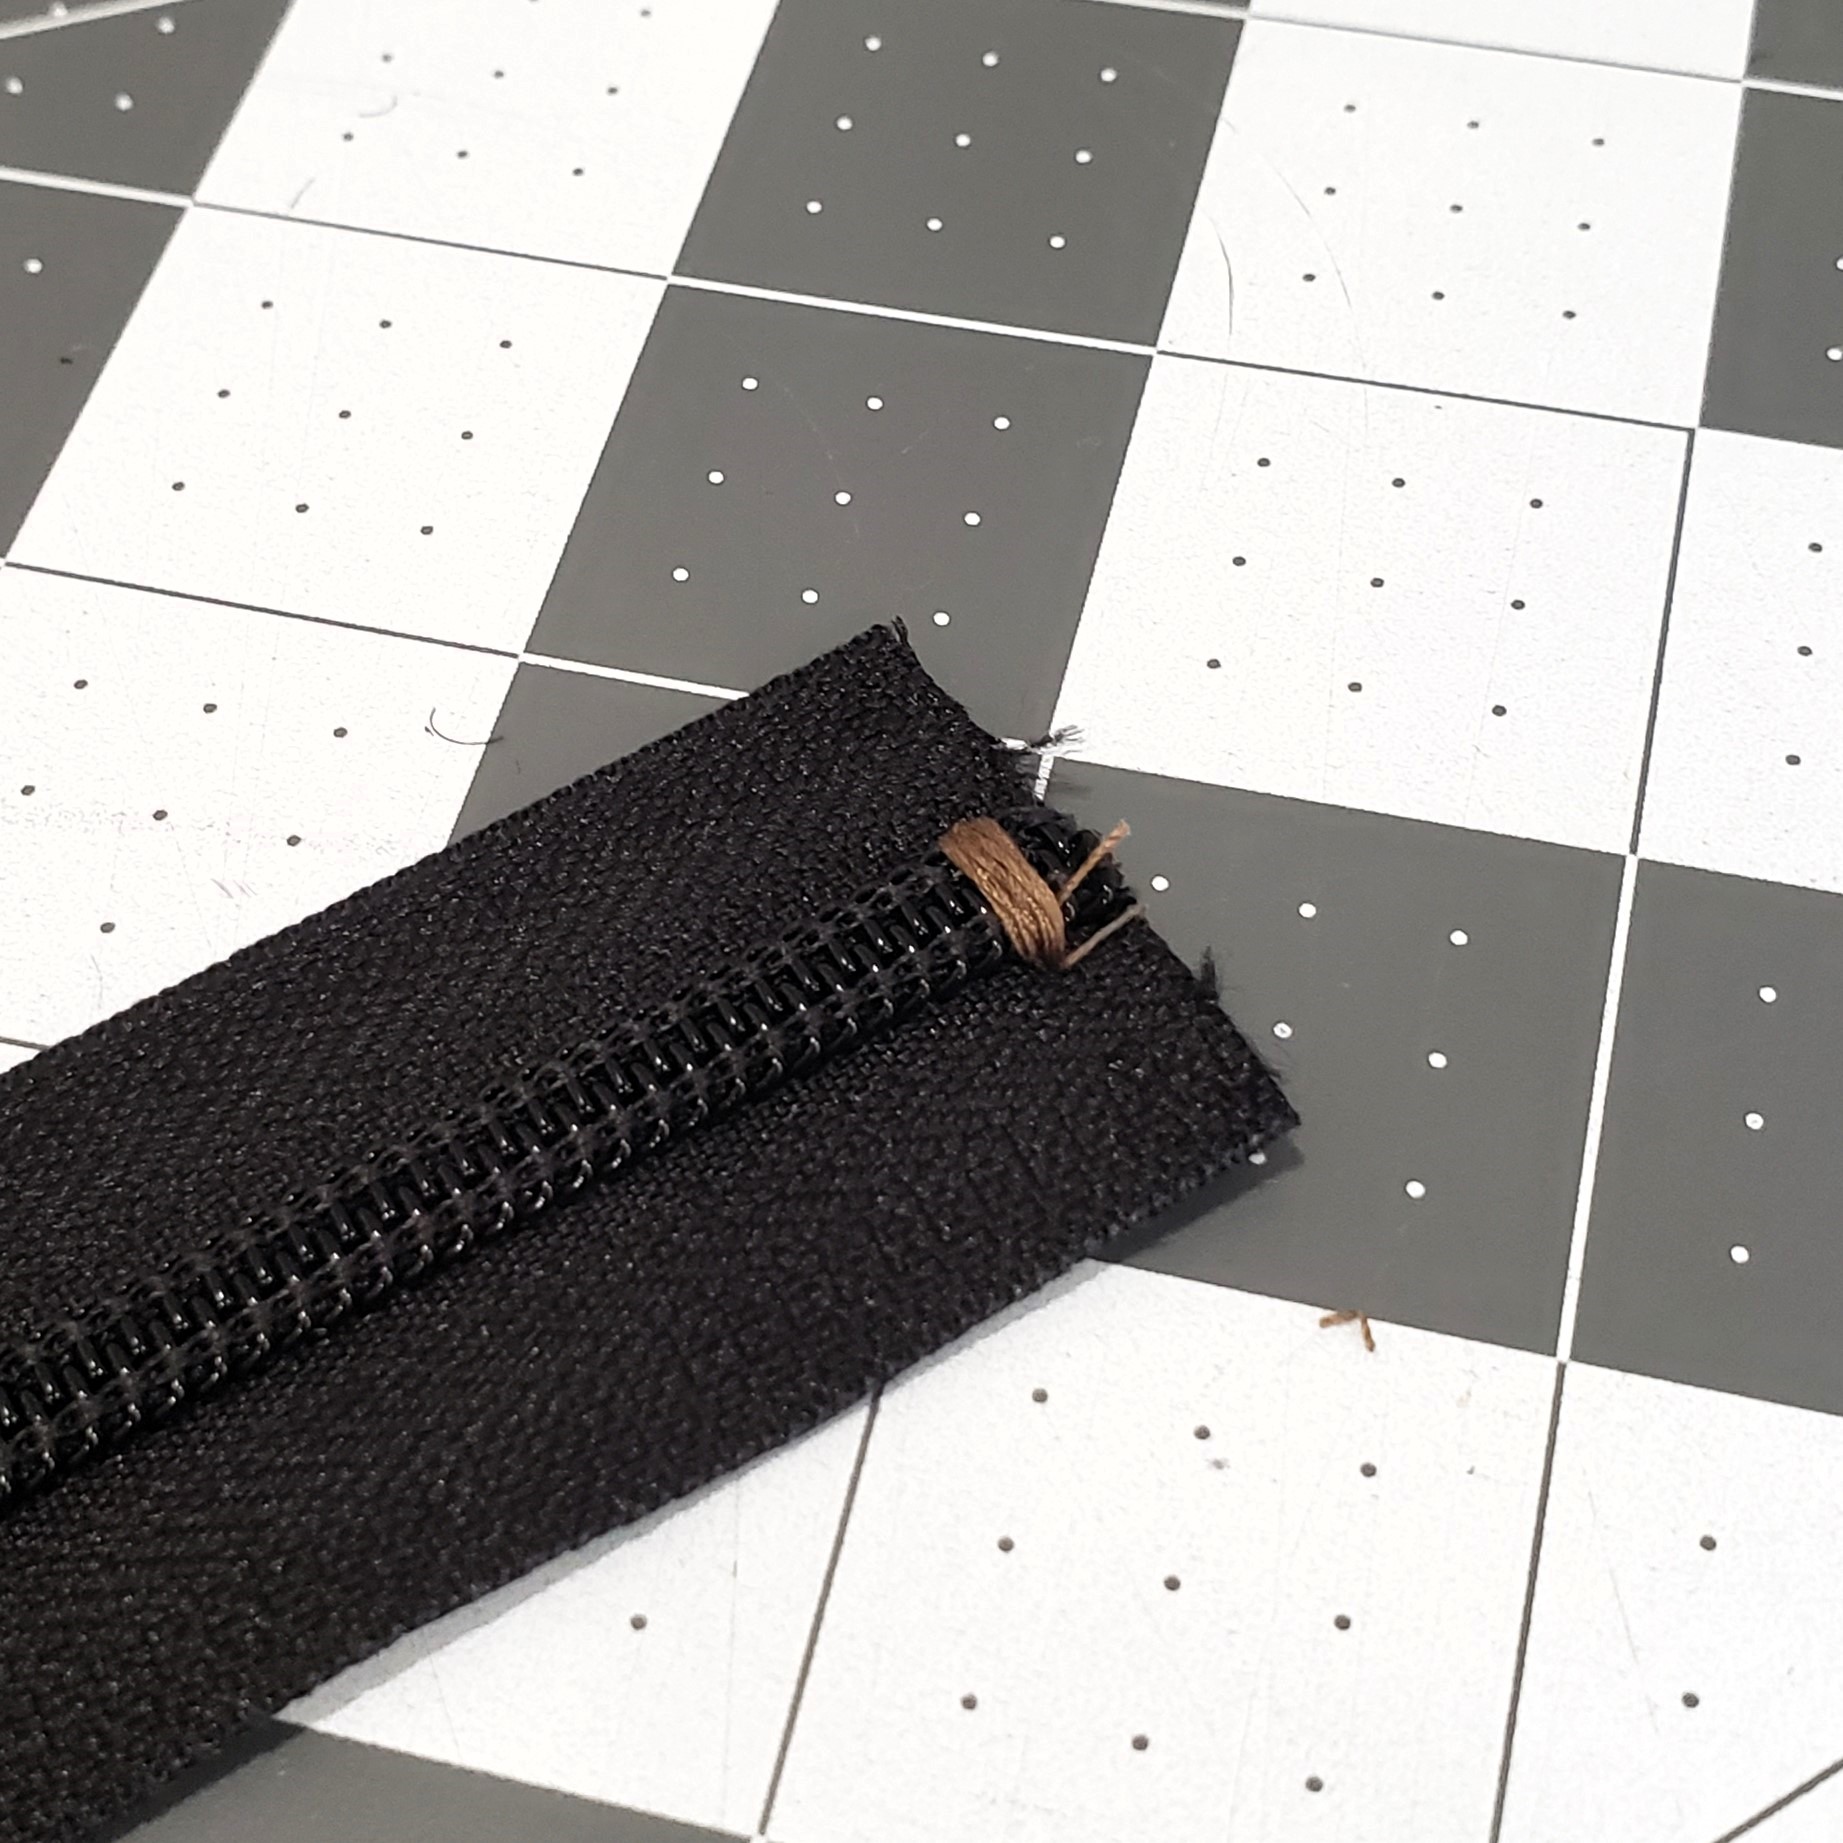
- Take your zipper coil end and mark or eyeball the spot about ⅛ inch (4mm) from the edge. Sew a short bar tack here to anchor the zipper together at the end. (On a size 5 YKK zipper I used a zig-zag stitch set to 0 length and 7.0 width on my Brother machine, and this cleared the zipper teeth. I like to tie the tails by hand at the end to ensure the stitch is locked down tight.)
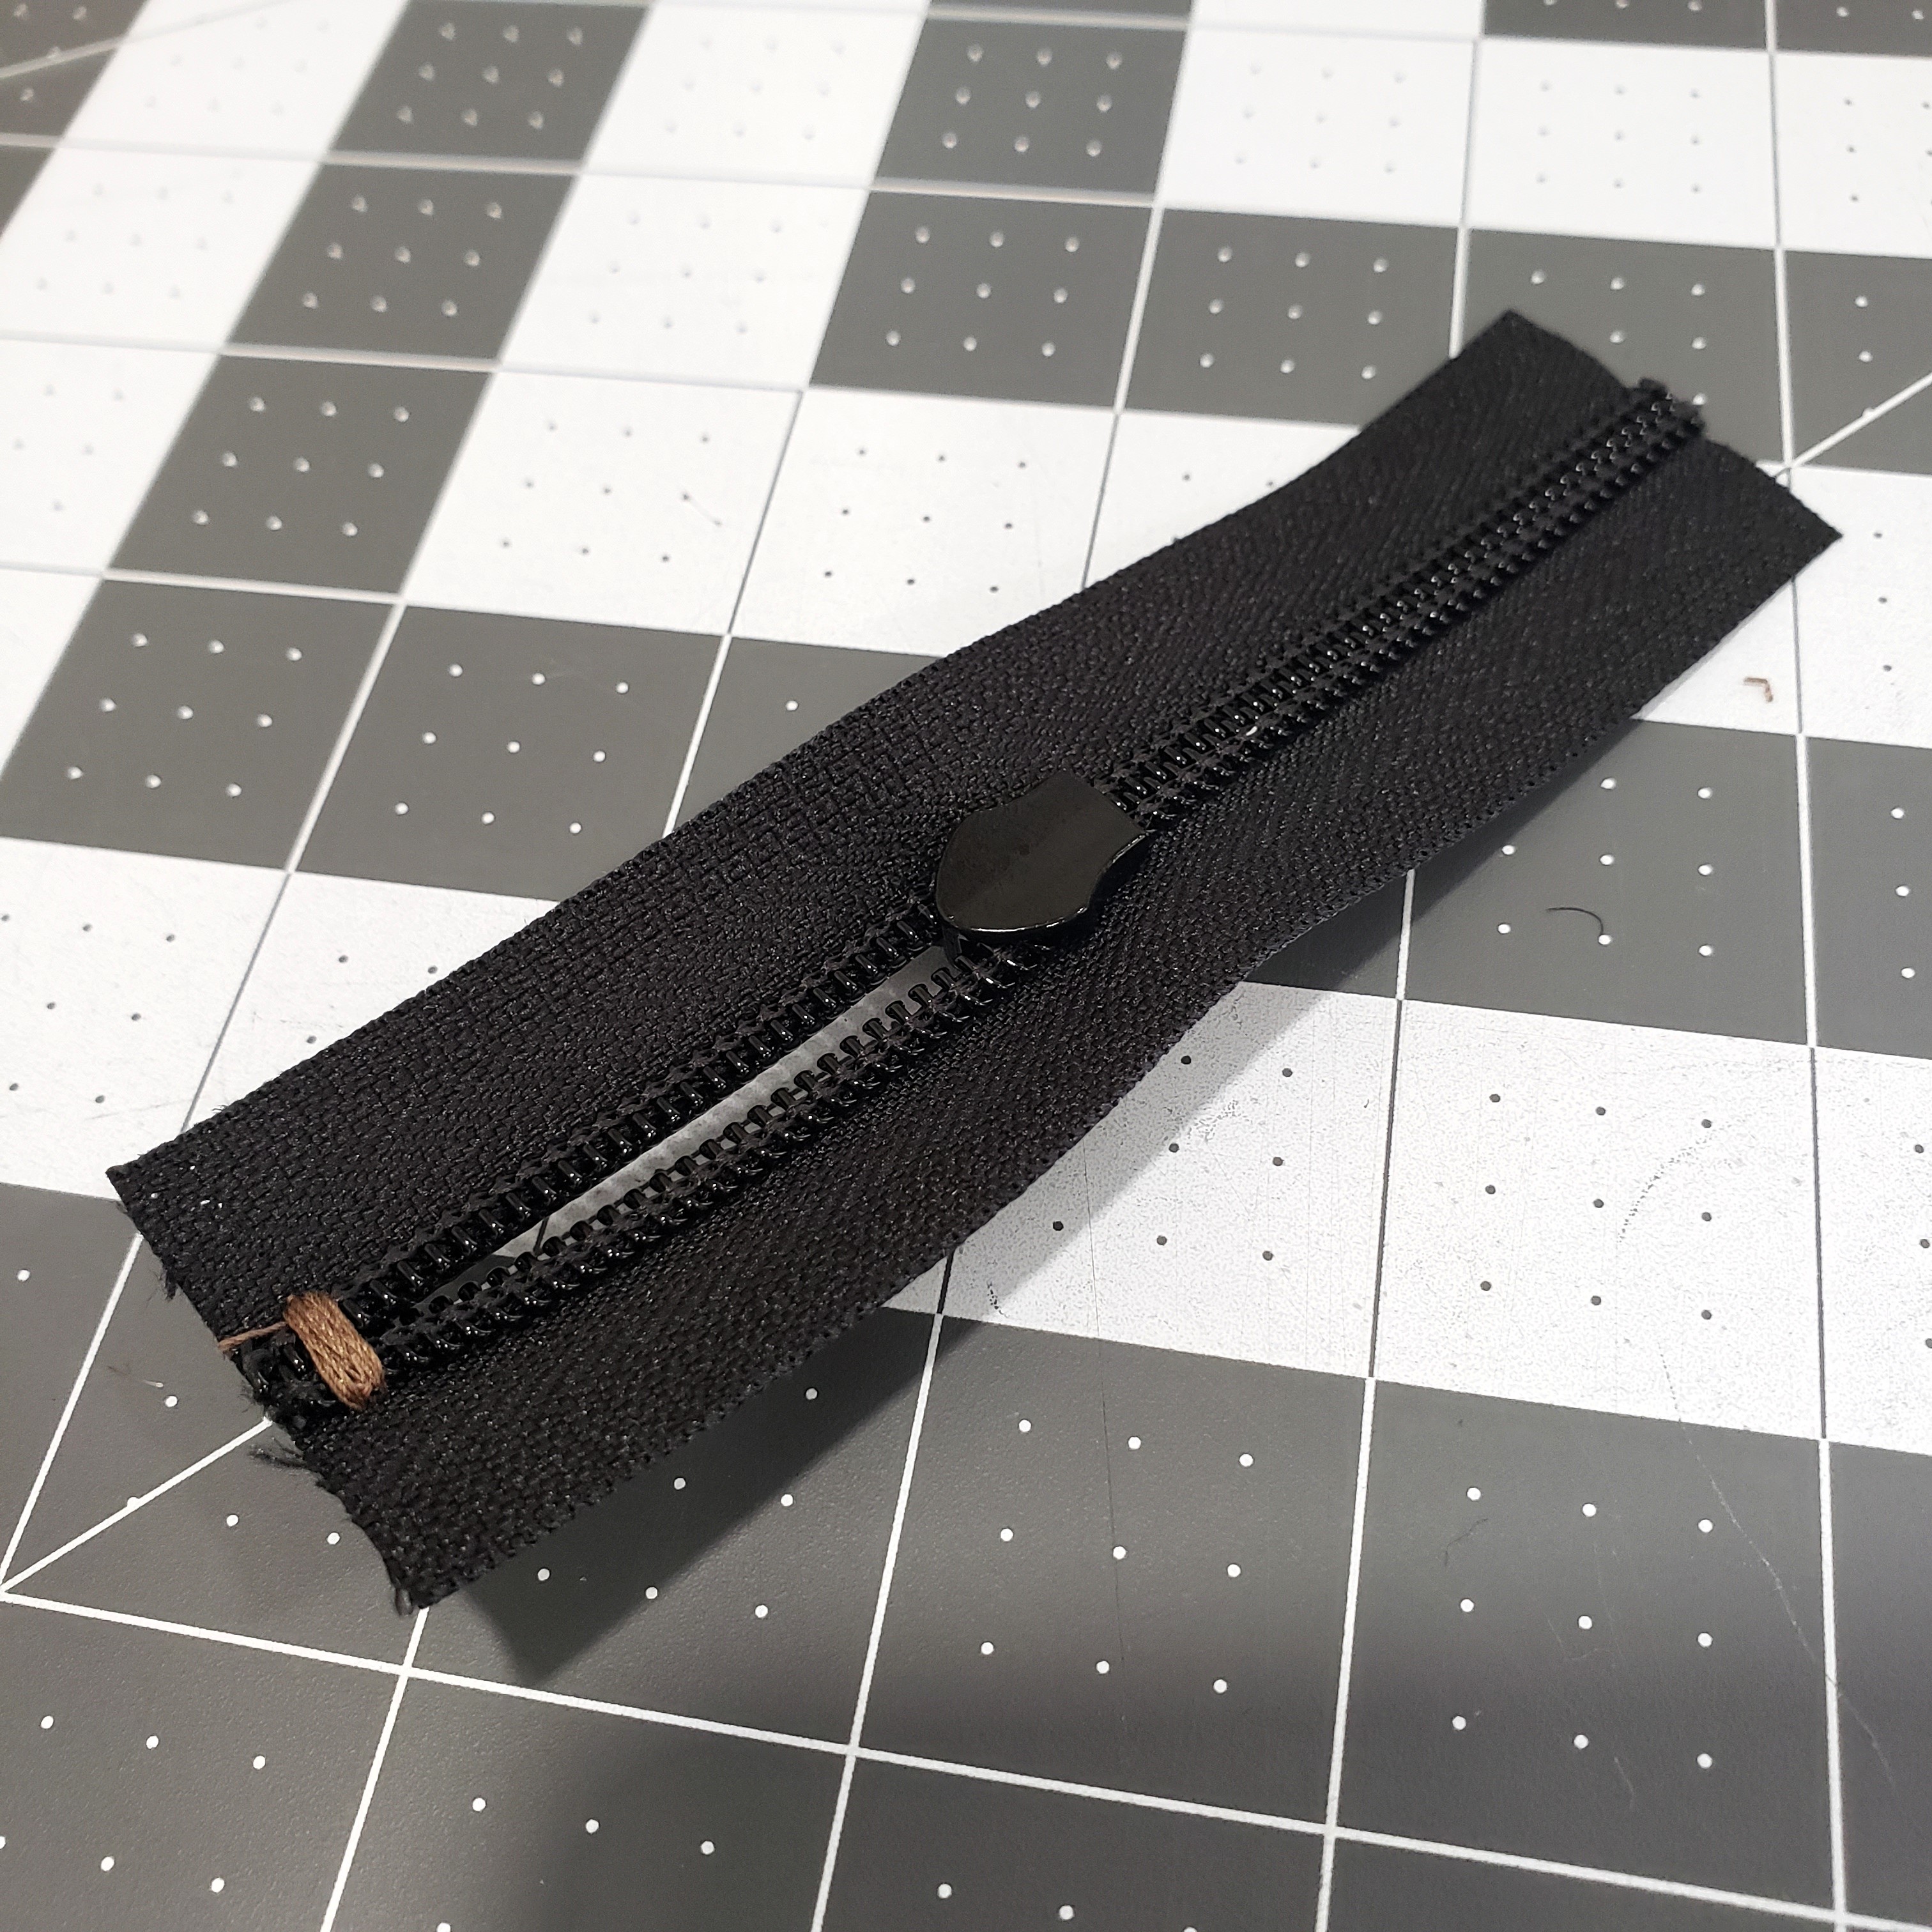
- At the other end, separate your zipper tape halves and feed on your zipper slider.
- Once the slider is on, bar-tack the other end of the coil like you did the first.
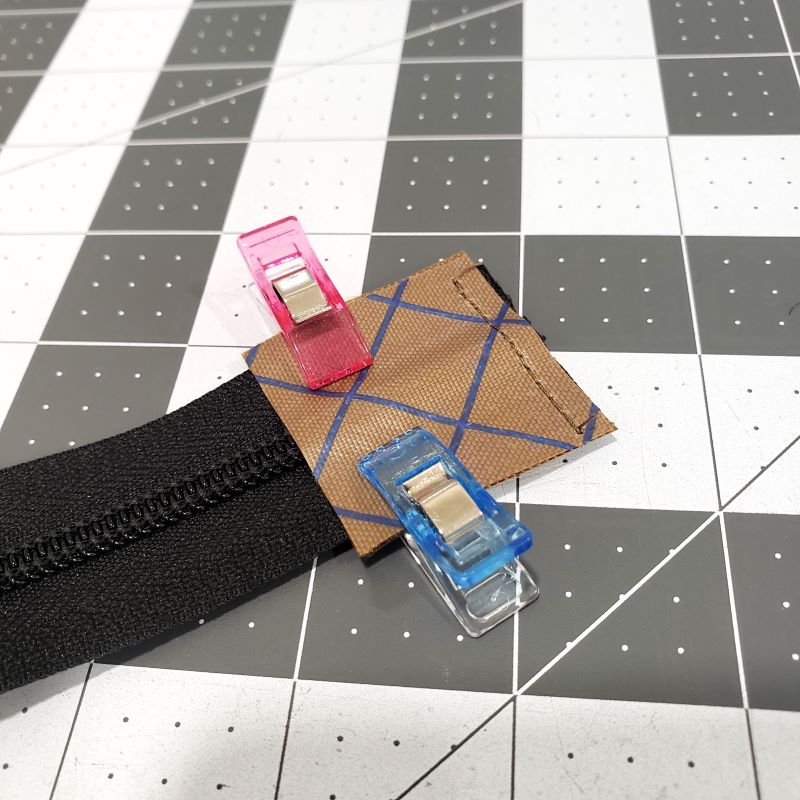
Step 3: Assemble the tabs
- Take two tabs and face them wrong-side facing out on each side of the zipper coil end.
- Align them at the ends, and clip them into place.
- Stitch down the end 3/16’’ (5mm) from the edge. Sew slowly across the zipper teeth.
- Fold over each tab about ¼-5/16 inch (6mm-8mm) from the end of the zipper coil, and clip into place.

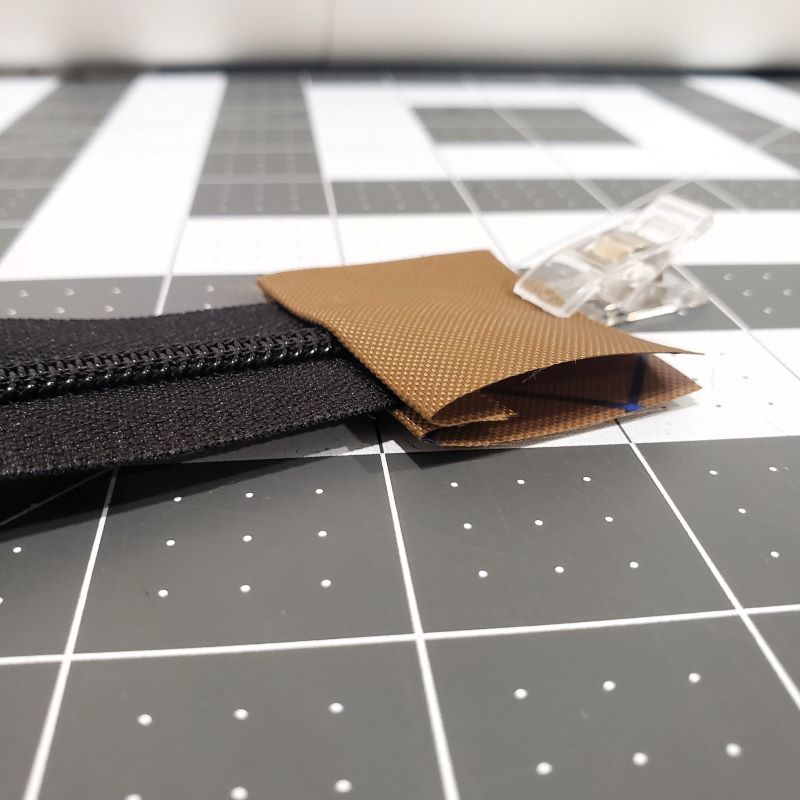
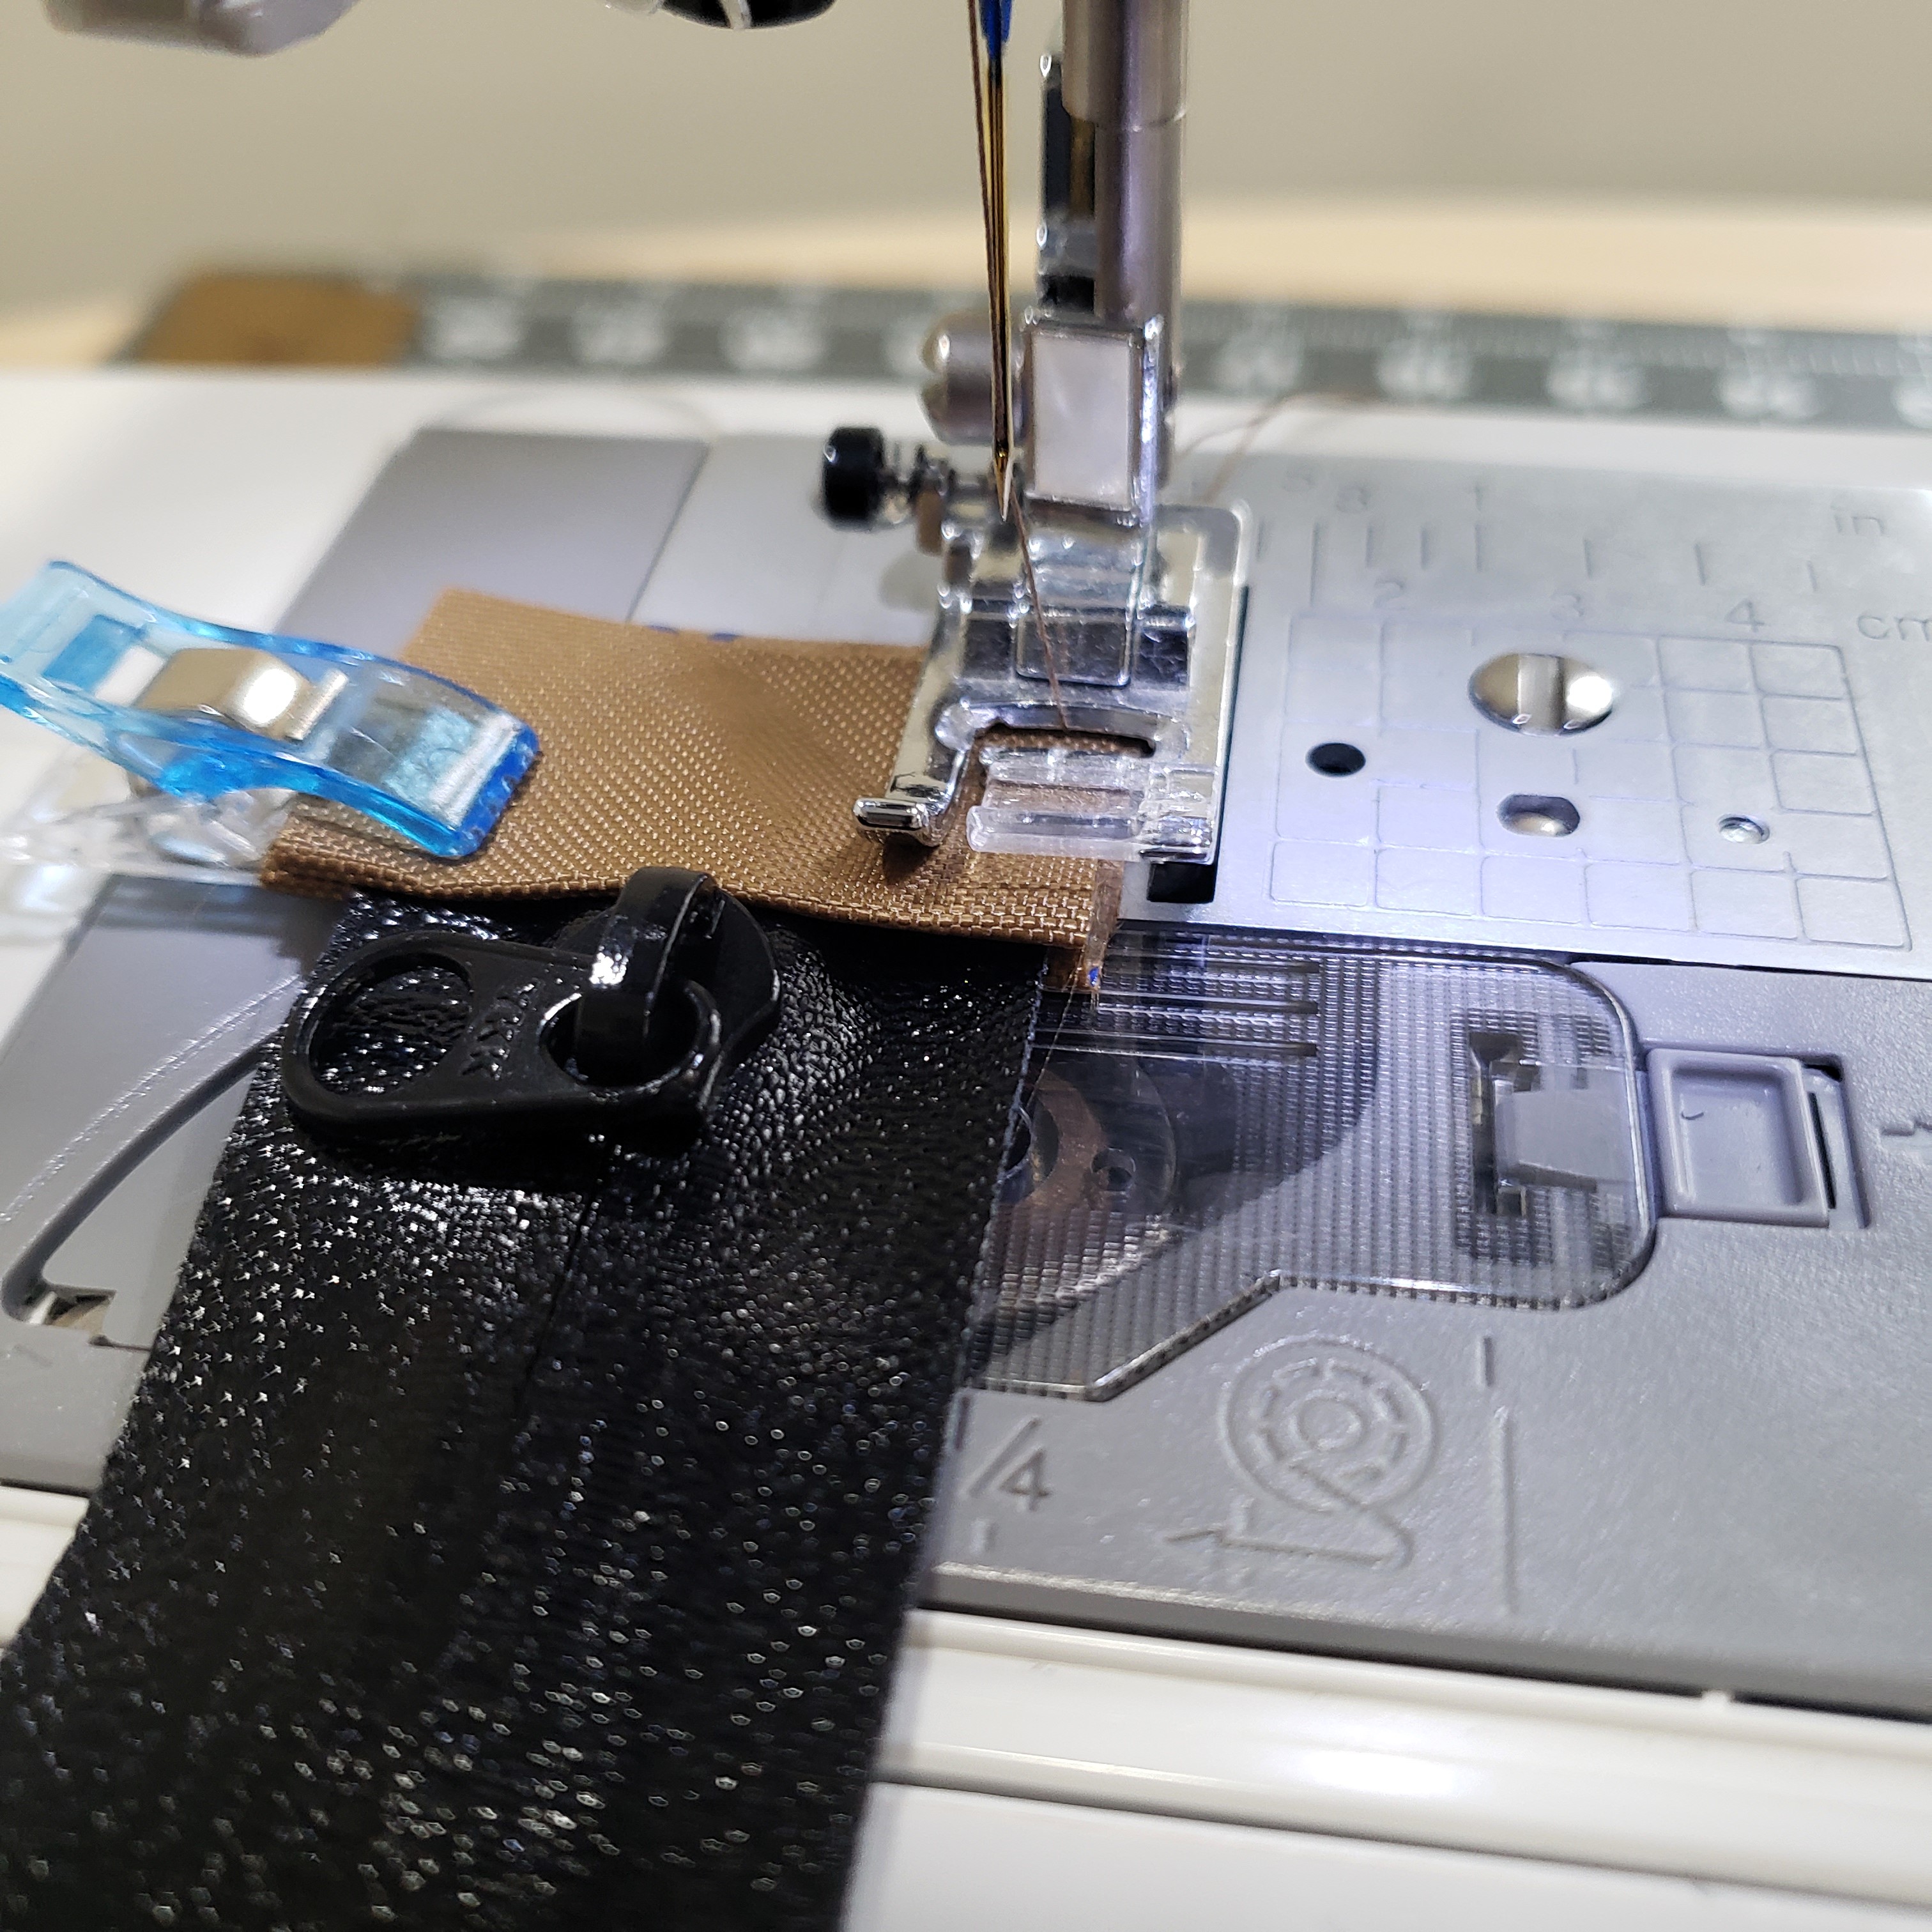
- Sew parallel to the zipper tape on each side of the tab, sewing through the tabs and zipper tape, connecting the two tab halves.
- Open the zipper to get the slider out of the way, and repeat the process on the other end. Make sure to use extra care to keep the zipper tape halves aligned, since it will be a bit harder with them open than it was closed.
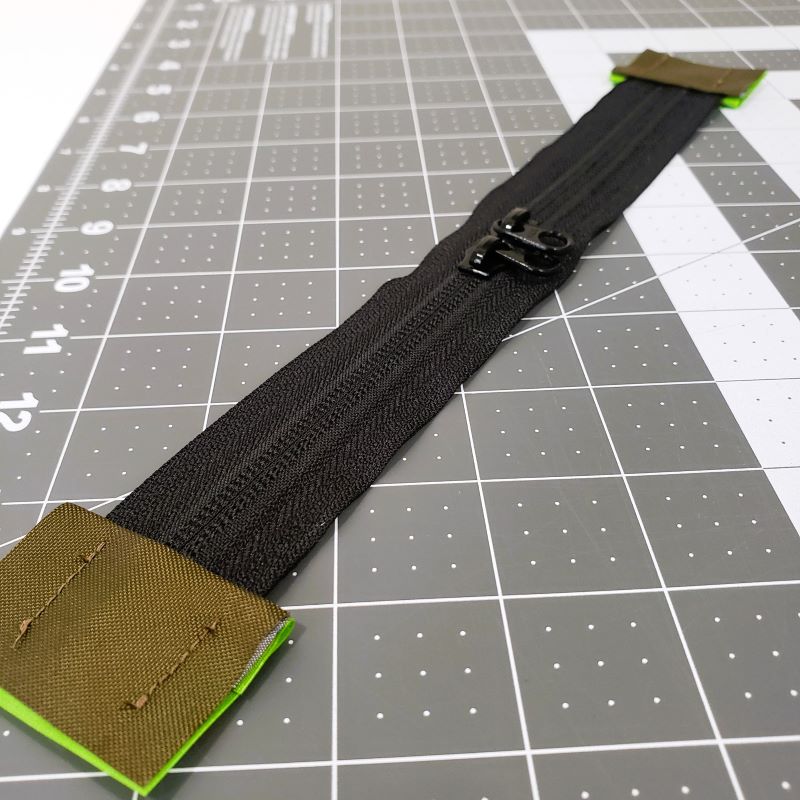
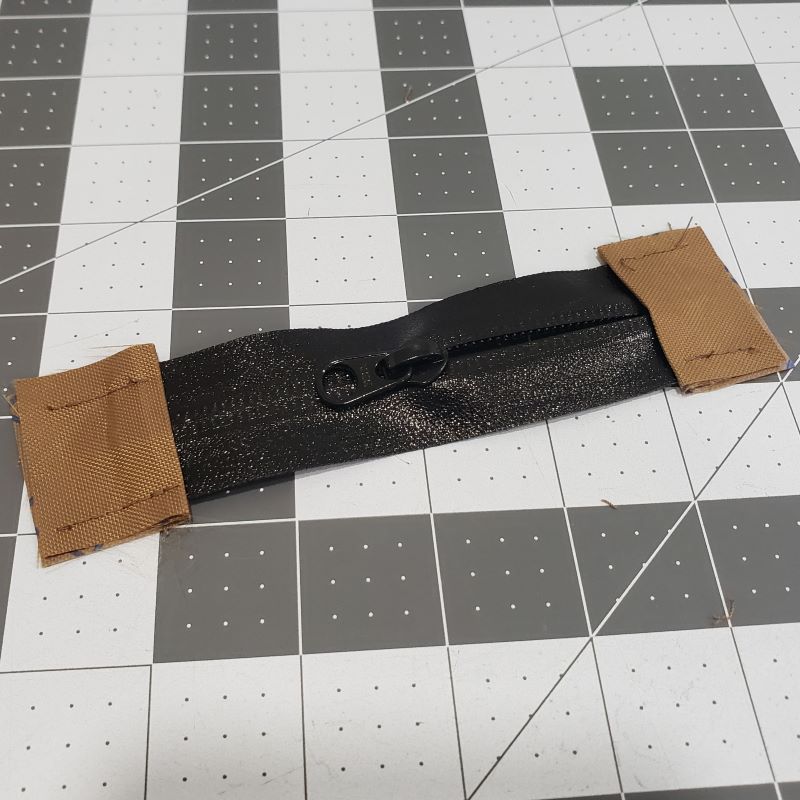
- You now have a finished zipper with about ½ inch (13mm) of fabric on each end, ready to sew into your next project.
Double-Slider Variation
For main compartments and other large bag zippers, a double slider makes the most sense. This way you can open the zipper from either side, or from the center. These instructions are abbreviated since we covered most of these steps in the Single-Slider instructions above.
Step 1: Assemble your materials
Just like you did with a single slider zipper, just add another slider.
Step 2: Add sliders first, then anchor the ends
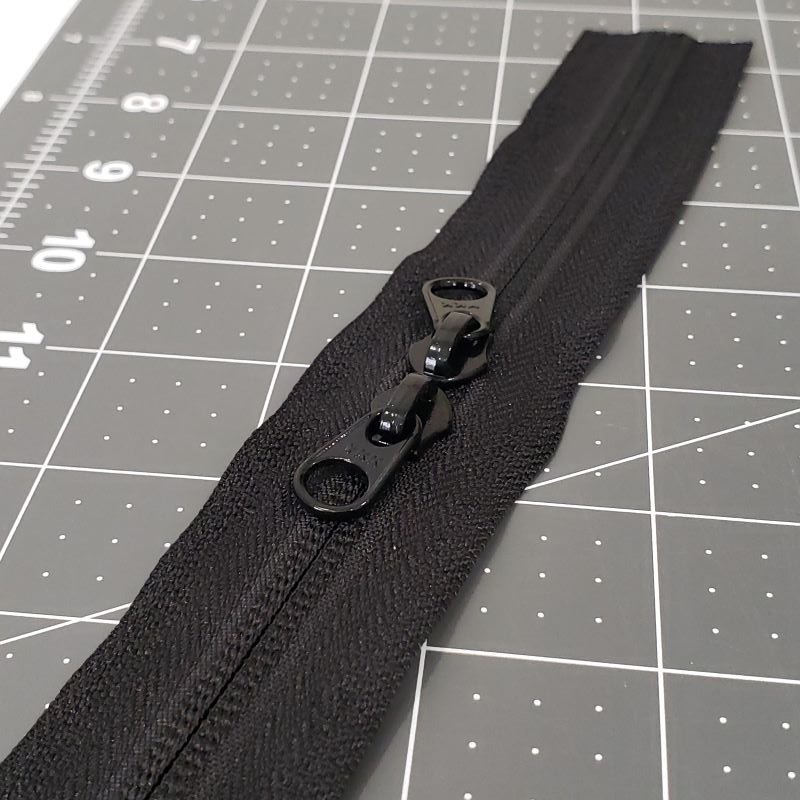
- Open up each end of the zipper coil one at a time and feed on one of the sliders. Slide them each into the center of the zipper coil where they will meet nose-to-nose. This will close the zipper coil behind them.
- Take your zipper tape end and mark or eyeball the spot about ⅛ inch (4mm). Sew a short bar tack here to anchor the zipper together at the end.
- Repeat and add another bar-tack at the other end of the zipper coil.
Step 3: Assemble the tabs
- Proceed through this step just like you did with the Single-Slider Zipper.
- When complete, you’ll have a double-slider zipper ready to sew into your next project!
Next Steps
Once you have your zipper assembled with tabs, follow the steps in the project instructions to sew the zipper into your project!
Continue building your skills, or get started on a project!

Guides
Learn how to build zippers, bind seams, and more

Patterns
Find a FREE pattern for your first project.

DIY Projects
Find DIY inspiration here.
Don’t miss out!
Sign up to be notified when we release new content and patterns. We respect your info and won’t spam you. You can unsubscribe anytime.
